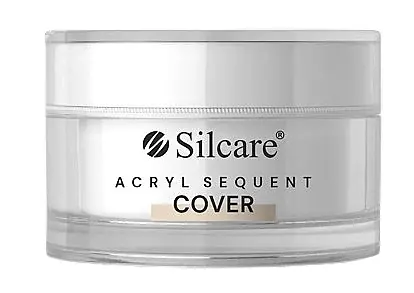
Nail Acrylic without HEMA and TPO – Nails
Original price was: $8.19.$2.45Current price is: $2.45.
Description
Age:18+
Volume:10 g
Classification:Mass-Market
Country:Poland
Made in:Poland
Caution:Do not inhale, For external use only, Store out of reach of children, Use only in a well-ventilated area
Sequent Acrylics paints are perfect for modeling, retouching, and filling imperfections. They are easy to apply and work with, making them suitable for both experienced artists and beginners.
Acrylic nail extension is a technique where acrylic powder (polymer) is combined with acrylic liquid (monomer). This method is highly valued for its unique features, ease of creating nail art, and the effects it achieves, and is often used in nail art competitions. The wide color palette, pigmented base, various levels of opacity, and additives allow for the creation of the most original decorations, such as abstract or stained glass motifs, reliefs, three-dimensional designs, decorative effects, and even small figures.
In nail modeling, a crucial technical aspect of the acrylic method is the correct mixing ratio of monomer and polymer—not only to ensure curing time but also to achieve the desired result and durability of the nail design. The ratio can be easily adjusted during the design process depending on the desired effect. For instance, a thinner sphere allows for creating designs in a painterly technique, blending backgrounds, or crafting design elements with sharp outlines. An important advantage of this method is not only the absence of the need for additional equipment, such as UV lamps, or time for removing the dispersion layer, but also the ability to work with the material during its polymerization process.
1. Обрабатываем свои руки и руки клиента дезинфектором.
2. Деревянной палочкой аккуратно отодвигаем кутикулу. Подбираем подходящую форму и размер типса к ногтю.
3. Наносим немного клея и распределяем его равномерно по вогнутой поверхности типса. Наклеиваем снизу вверх таким образом, чтобы под типсом не образовались пузырьки воздуха. Остатки клея удаляем.
4. Типс укорачиваем до желаемой длины. С помощью пилки придаем ногтю форму.
5. Выравниваем переход между типсом и натуральным ногтем с помощью пилки. При этом стараемся не задевать натуральный ноготь. Кисточкой или щеточкой удаляем пыль.
6. Полировочным блоком матируем все просвечивающиеся участки типса.
7. Устраняем пыль и обезжириваем. Ожидаем минуту, чтобы обезжириватель испарился. После этого на весь ноготь наносим праймер.
8. В емкость наливаем жидкость. Осторожно смачиваем кисточку и погружаем в акрил так, чтобы образовался шарик. Перемещаем шарик на ноготь и формируем белый кончик ногтя. То же самое делаем с розовым или прозрачным акрилом, формируя остальную часть ногтя.
9. После высыхания подпиливаем ноготь, придавая ему нужную форму. Если вместо типсов были использованы шаблоны, то отклеиваем их.
10. Полируем ногти до блеска с помощью полировочного блока. Также можно использовать лак-финиш, гель-финиш или UV-Coat. Для работы с гелем нужна лампа UV. В завершении наносим масло для кутикулы.
Related products
-
Sale!
Magnet rod for creating ‘cat eye’ effect – Nails
Original price was: $5.25.$1.57Current price is: $1.57. -
Sale!
-
Sale!
Top Coat ‘Flower Flakes’ – Nails
Original price was: $33.96.$10.18Current price is: $10.18. -
Sale!
Soft, Thin and Peeling Nails Complex
Original price was: $4.91.$1.47Current price is: $1.47.
Reviews
There are no reviews yet.